Sunday, March 30, 2014

3D Modeling Update

I finally got my prints back from Shapeways, and overall, its still a work in progress.

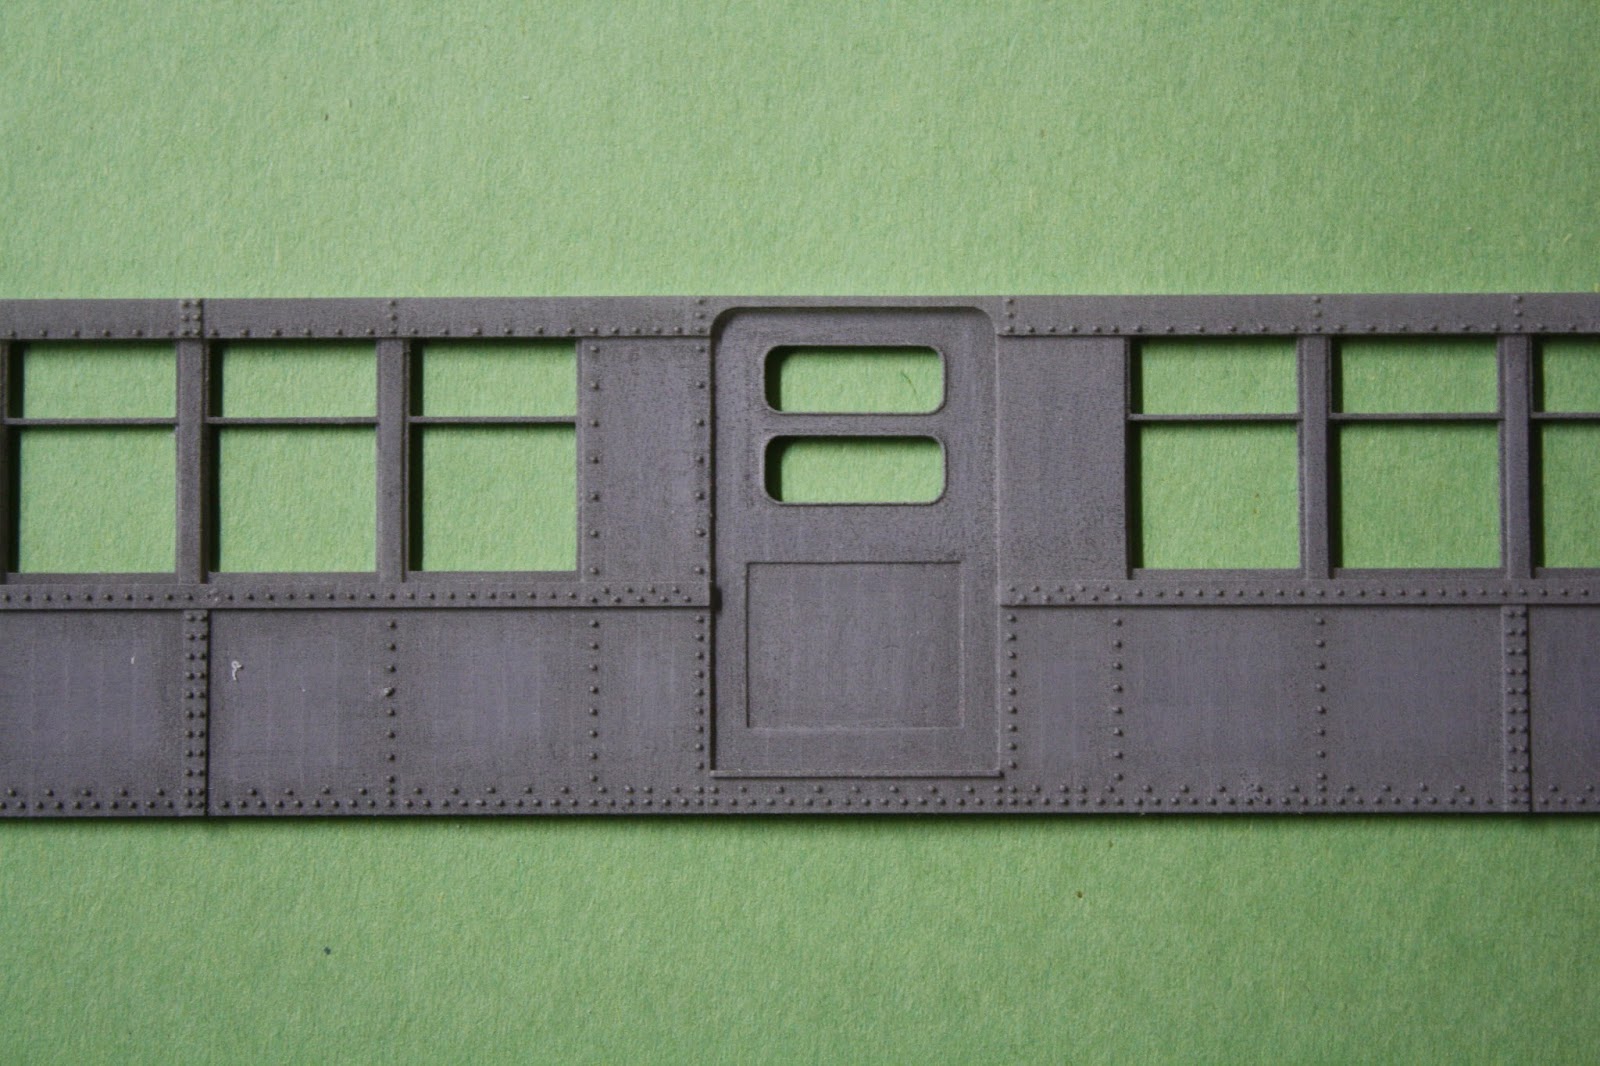
Below are some of the baldie samples placed loosely together.


 Overall, the quality is pretty good, The end in the above photos has NOT been sanded. The side however has. I think as printed, with some sanding, the prints can make a decent model.

The side does have some warp-age to it, but that could be corrected by internal bracing.

My original plan was to make molds of the sides and then cast the sides out of resin.

Well, that didn't work out too well. I tried to make a mold out of one of the sides, and I didn't prime the side beforehand nor did I add mold release. BIG MISTAKE as seen by the below "after" pictures of what was left of the side:


As you can see, the silicone rubber stuck to the part and basically broke it when I tried to remove the side from the material.

I was able to successfully make a mold out of the side shown at the top of the page. However, I haven't really been too happy with the quality of the castings I've been getting. I think for a model, just working directly from the prints is preferable.

My Met L structure turned out very well. However, I realized that copying directly from prototype plans was a mistake. The center line of the track girders on the prototype is 5 feet. With O standard being 5 feet, I thought it wouldn't be an issue in replicating the measurement in the model. 

As can be seen in the below photo, the O standard gauge, while 5 feet, puts the center line of the rail on the outer edges of where the girder would be. The flat areas on the cross girder are where the long, horizontal girders would be.


The girder center lines should fall directly under the center line of the rail, NOT the gauge.

I will need to redraw the model and resend for printing. The difference isn't large, but if going through the trouble of making the lattice style, the girder / rail spacing needs to be correct.

The model I have is correct for proto48 track, but not standard O gauge (5' gauge track).

I've also made progress on my newer, more detailed structure. This L structure is a combination of cast girders, styrene shapes and 3D printed (then cast out of resin) corner braces.


I've tried to add as much rivet detail as I can to the various components. The column height is a little taller than I'd prefer, but that was dictated by the benchwork in this area of the layout. The track obviously needs to stay level with the rest of the layout, which dictates the column height.

Tuesday, March 11, 2014

Rejected, Part Two!

Ugh! Rejected again by Shapeways!

This is getting to be a bad habit!

Anyways, on the ends of the 4000's, I had a bracket to hold the destination sign. Apparently 1/2" thickness in O scale is too small due to "thin wires".

The pictures from Shapeways:


So, no built in brackets allowed. I've left a small, square pad where I can attach the cross piece to hold the destination sign.

This error is unlike my first error. That first one was just sloppiness on my part. I didn't properly size part of a model.

On this error, I guess I just pushed the boundaries of the material too far. Oh well, corrections have been made (again).

Saturday, March 8, 2014

Virtual Rapid Transit

All work and no play makes for a boring life ... so ...

When I'm not working on either the layout or making 3D models, some virtual modeling / rapid transit planning is in order.

First up, is a rapid transit game / simulator called Cities in Motion 2. In this game, you are the owner of a transit company and can create bus, trackless tram, streetcar and subway lines. You buy equipment, set schedules, set fares and attempt to run a transit empire.

Some screen shots of the city I've been working on. So far I've got street cars (light rail in the European style), buses and some subway. I play on the easy setting, so unlimited money means unlimited fun.


This game is available on Steam, for about $30. Steam often does sales, so watch for those and it can be had for a lot cheaper.

A new (and FREE) game is called Mini Metro:


In this web based, minimalist game, you create a subway system as new stations pop up. For a very simple, minimalist game, its quite fun and engrossing. 

It does require a plug in to be installed, but I've encountered no issues (it isn't Flash, so there is that!)/

The link to play is: Mini Metro


Monday, March 3, 2014

Rejected!

Whoops!

One of the pitfalls of 3D printing is errors in the models that don't meet the requirements of the materials being used to print.

I received the below message from Shapeways today:


Hello 1958mga,
After taking a closer look, we cannot print one of the models in order XXXXXX (placed on 03/01/2014).
  • We've credited $7.44 to your account.
  • You may be able to update and print your model based on the information below.
If you have questions or concerns contact us at: service@shapeways.com. We're happy to talk with you about these rejected models before you update them.
Model: Metropolitan Support Brace Sprue 3.5 1
Materials Affected:
We cannot print your model due to: Thin Walls. Here are some details to help you resolve this issue:
The minimum supported wall thickness is > 0.3mm for this material. Please thicken the walls of the model. 


Whoops!

This is for the support braces on the Met Columns:


The support isn't symmetrical if you flip it 180 degrees ... that is, it is longer than it is tall. So, in order to make a mold and eventual casting easier, I decided to make a "mirror" image of the part on a sprue (so I only have to print once):


The model on the left is the model that I made second ... and I now realize I made the thickness too thin ... 1/2" in O scale.

The fix will be easy and take about a minute ... just some pulling of the surfaces to thicken things up. Its just annoying that I have to re-upload and make a new order for this one part.

At least Shapeways was kind enough to send a picture with the problem areas so the fix will be easier.

Oh well!