However, I've always wanted to make a more detailed structure. One issue that prevented me from doing this was determining what the best way to add rivets would be. Since I also planned on casting the sections to speed construction, I didn't think using rivet decals (such as those provided by either Archer or Micromark) would work out too well. I wasn't sure as to how they would look after being cast.
So, a while back, I ordered a set of riveting dies from Germany. Unfortunately I can't locate the name of the website that I ordered it from.
I have made a straight 12" (48 feet) section, and have modeled both sides of the girder:
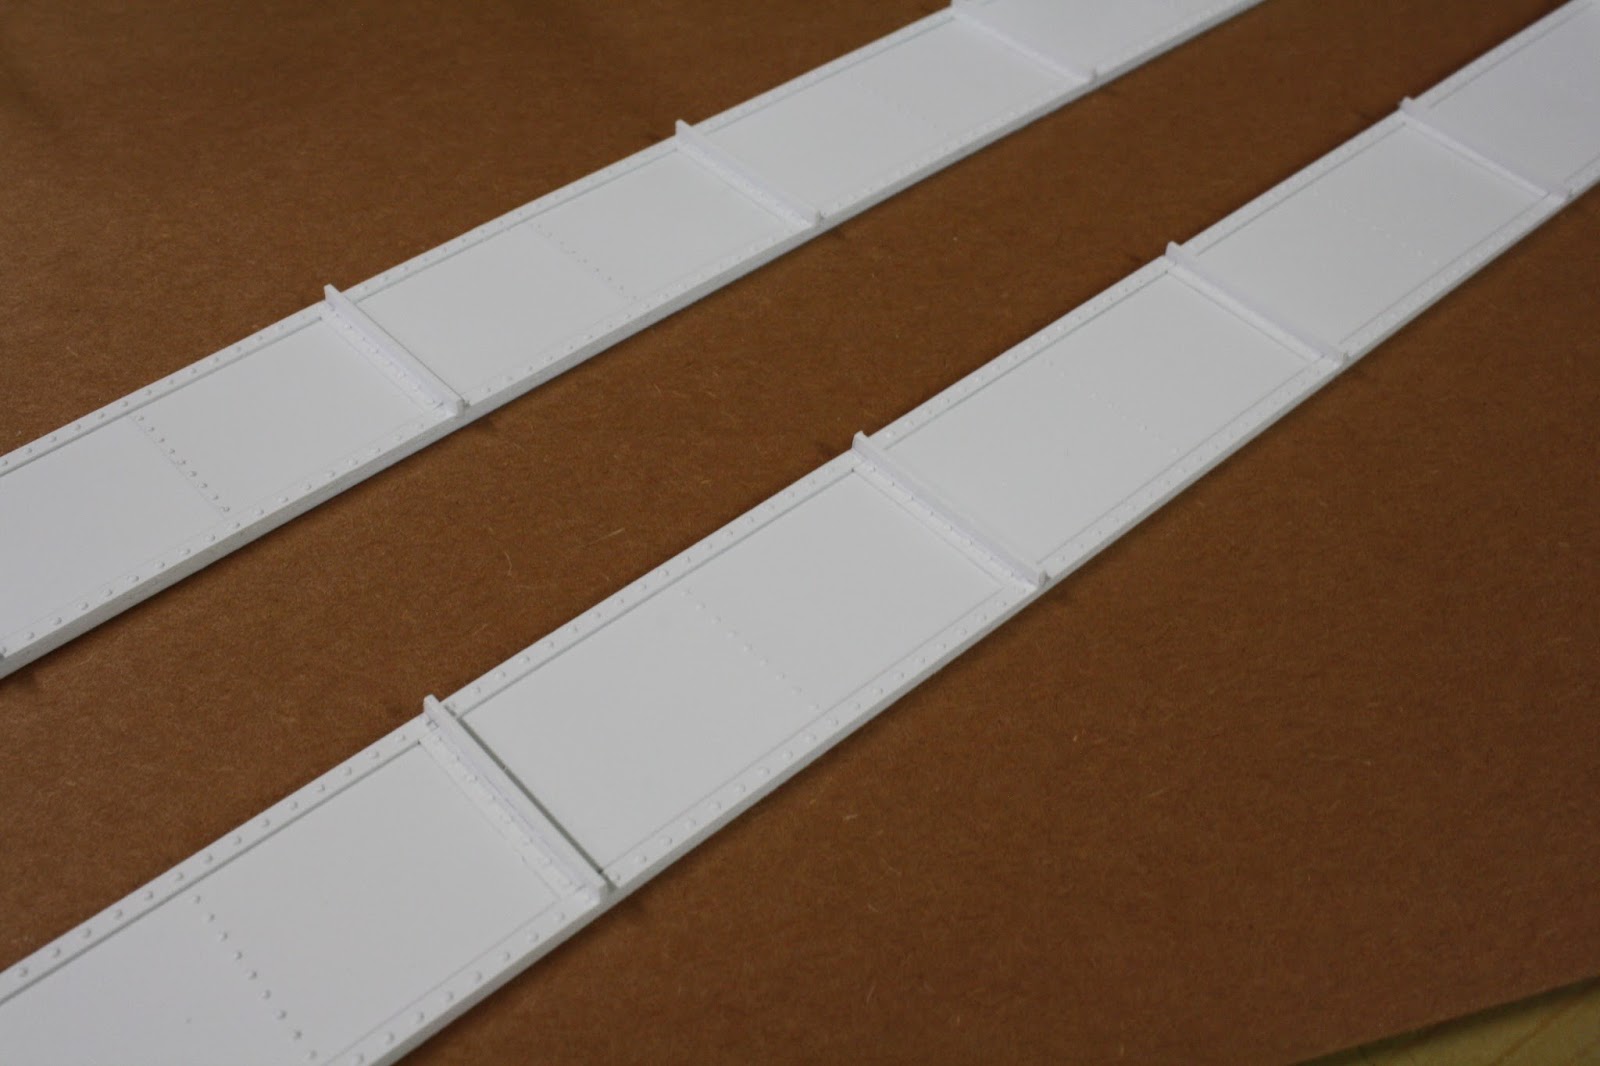
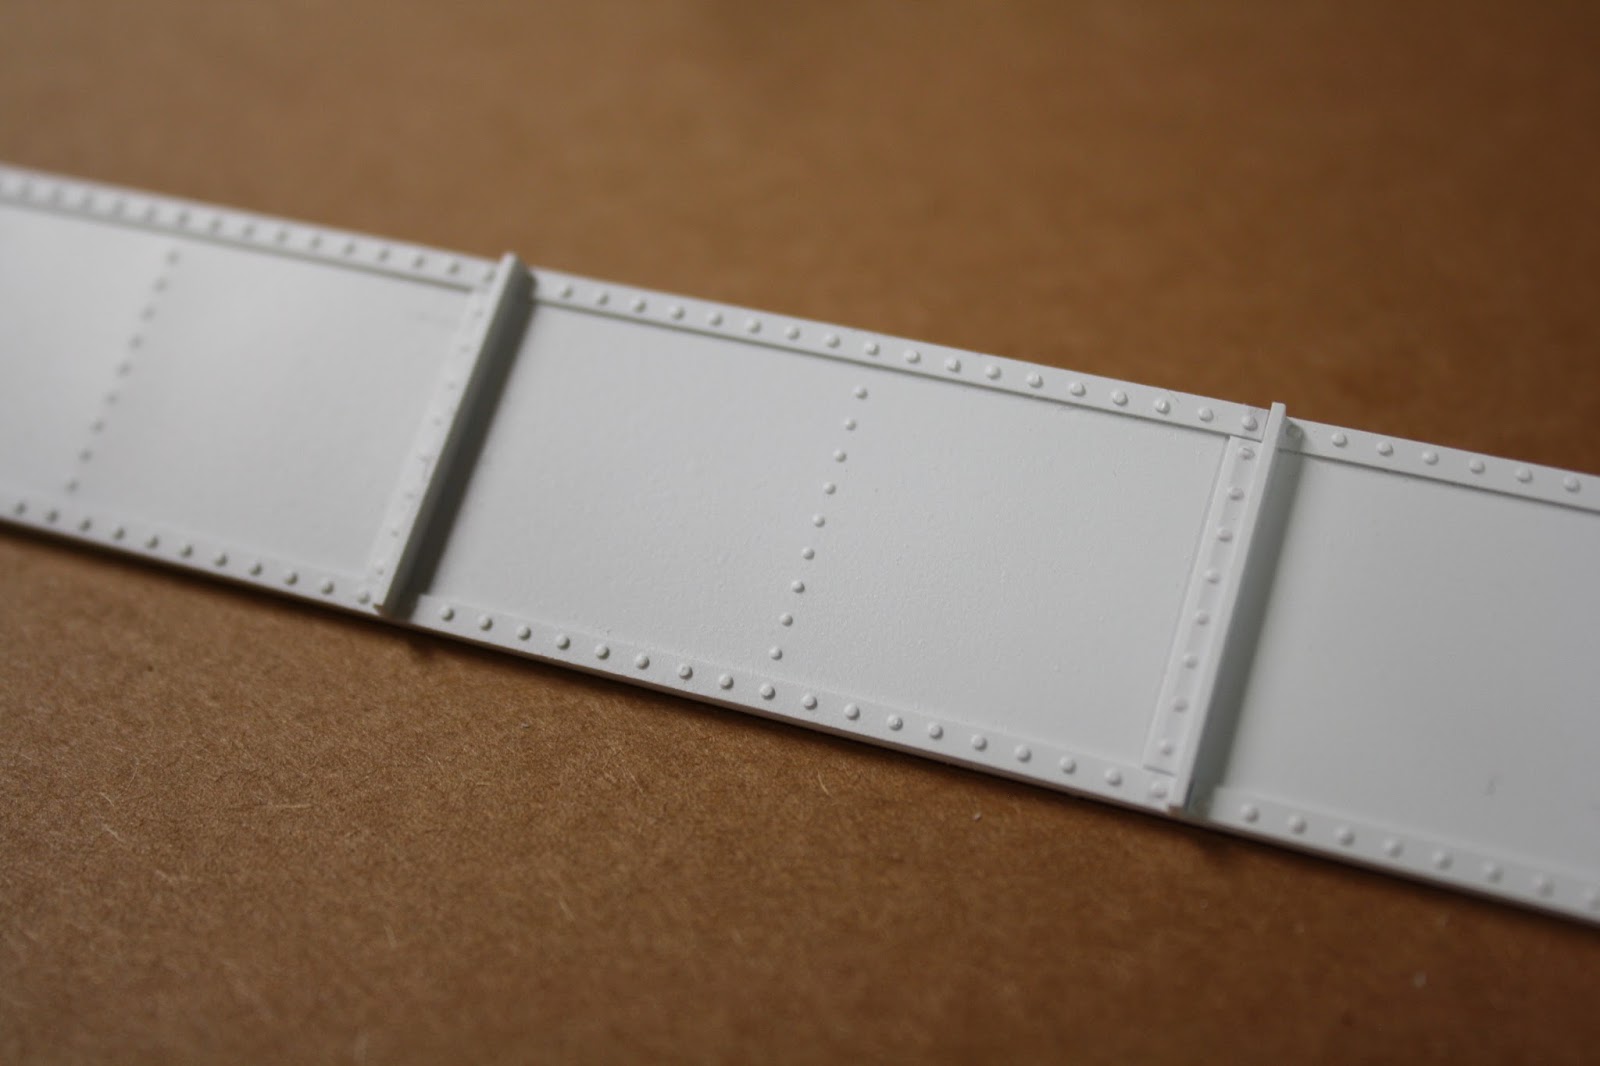
A closer view of the rivet details:

Using these two sides (front and back), I will make castings of both, and sandwich a piece of 0.080" styrene between the halves to make a girder. I will then add styrene strips to the bottom and top of the girder to make the flanges. The castings will be more decorative while the 0.080" core will make up most of the strength.
The dies, which I believe are actually for 1:43.5 or European O scale:

For the strips of rivets, the proper die is selected and placed in the metal carrier. I have made a small stryene holder to hold everything in place:

Putting in the bottom die and aligning the styrene strip (in this case 0.015" x 0.080"):

Then put the top die in place and start pressing away. The bottom die prevents the styrene from deforming, so the rivets turn out very nice.

The rivets on the web of the girder are done in a similar manner. The proper die is selected (again I made a small styrene alignment tool):

Line everything up and start punching away. Again I am using 0.015" styrene.

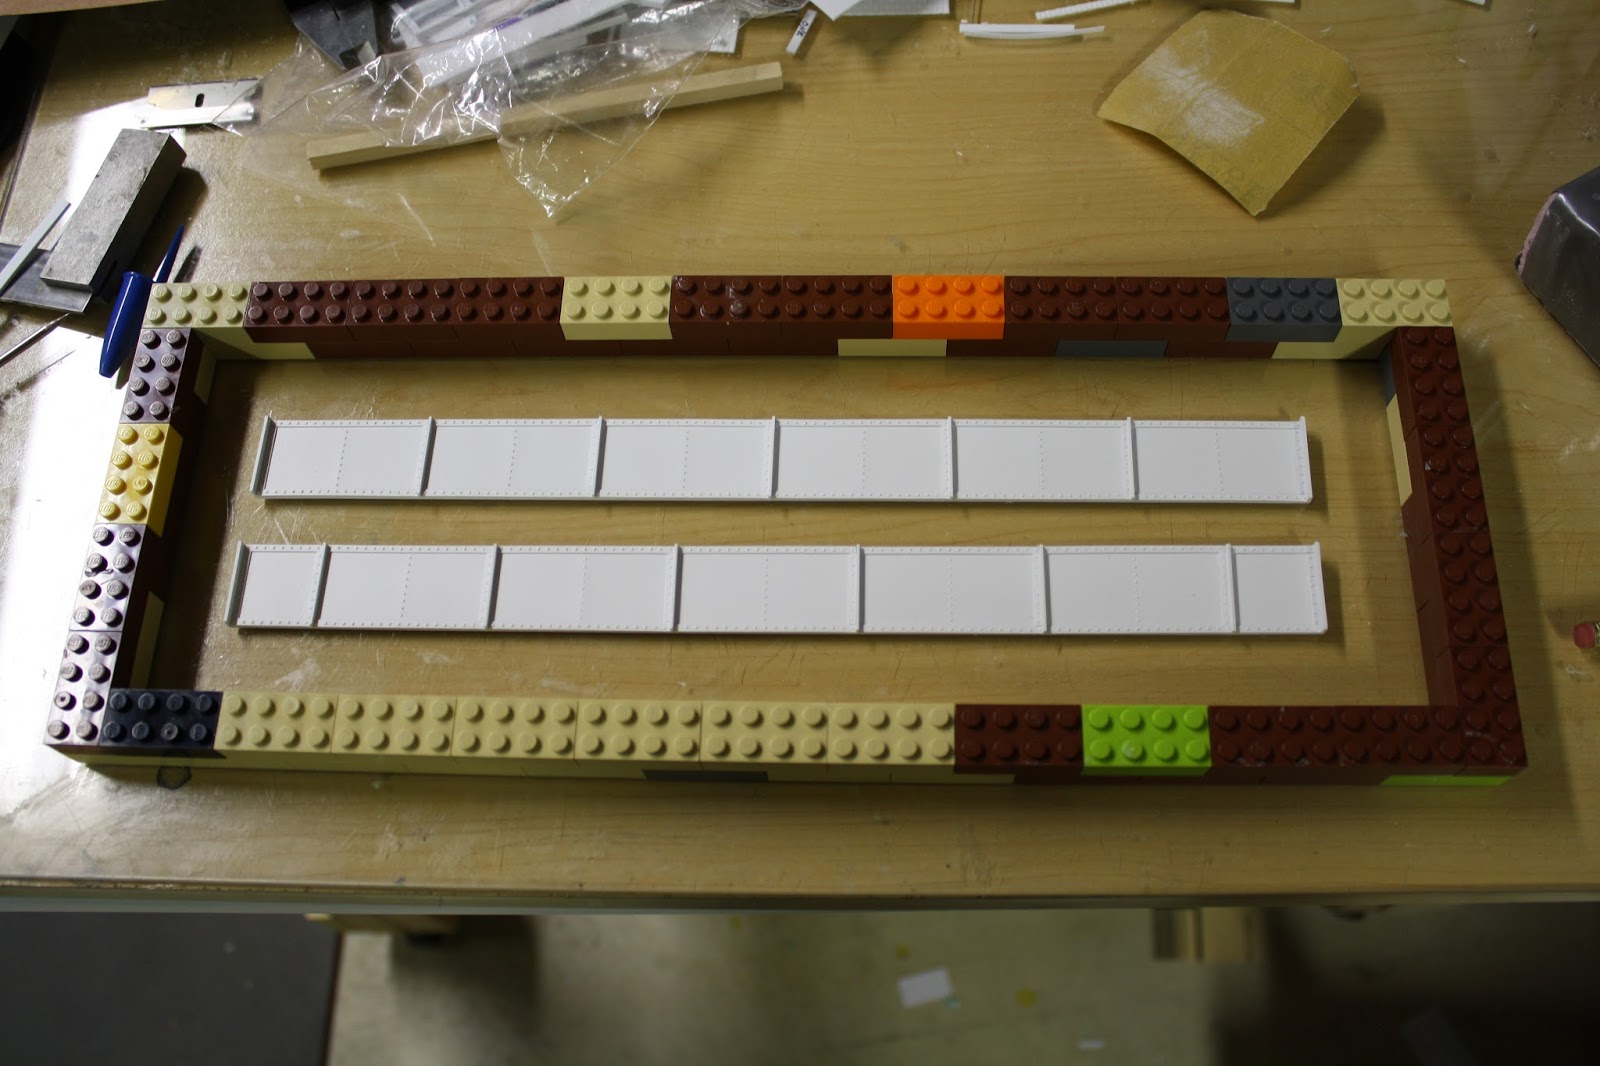
Then, after priming the girders white, I made a mold box out of borrowed Legos. I seal the Legos to my plate of glass using Vaseline, and "glue" the girders to the glass also with Vaseline. The Vaseline won't prevent the silicone mold material from completely creeping under the masters, but it'll keep them from "floating" up.
For making a mold, I use the following materials I get from Reynolds Advanced Materials. They have a store in Countryside, IL, that is conveniently on my way home from work.

I don't use a pressure vessel, so, its best efforts. The mold filled with silicone rubber:

The material sets up in about four hours, but I like to leave it sit overnight to be sure. I'll post a follow-up to see how this works. I ran low on silicone so I had to use some old stuff I had laying around...not sure how that will work.
Benchwork expansion:
I built an approximately 9' long by 30" wide shelf expansion that will eventually be a terminal of some kind on the other side of my layout / utility basement room:


I had to relocate most of my signs, but that's a small price to pay for more layout. I am also making a connection behind the hot water heater to the rest of the layout. The far left section of the benchwork is removable so I can, if ever needed, remove the hot water heater.
The signs were moved to the other side of the layout. I've also re-purposed some of my old kitchen cabinets for additional storage. In the picture above, the cabinets are underneath the new benchwork. In the below, I put a large wall cabinet on wheels so I can move it out of the way.

I've also begun mocking up the staircase to the Southport Station:

And a view down the other side of the layout, with some base cabinets, but still very messy.
