Friday, April 21, 2023

63rd Street Prototype Structure Done

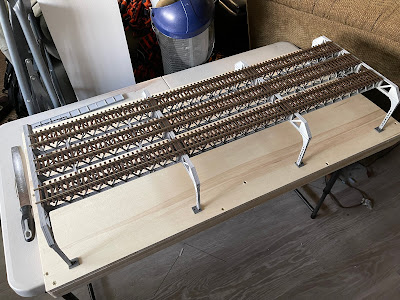
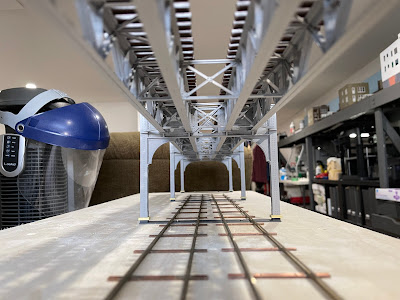
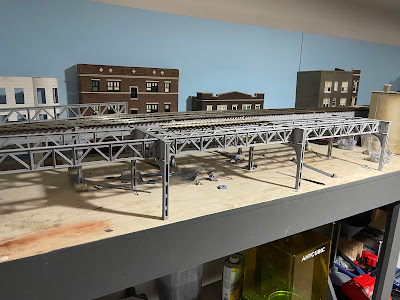
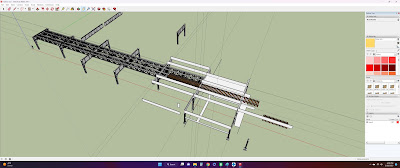
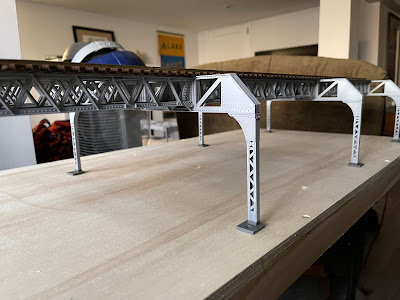
 The prototype for the 63rd Street L structure has been completed and assembled:


I'm not yet sure how (or if) I'll incorporate this into the layout but its good to know I have the basic design done.

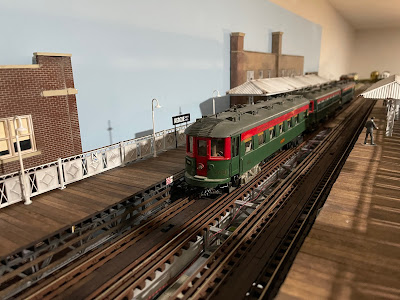
And ... as I feel like I've been neglecting the actual layout for too long, I've started to try to finish some of the "landscape" under the L.

Since this is Met, through the near Southwest side, I'm going for a more "vacant lot" look under the structure. I do however, need to do a better job of camouflaging the wire for the station wiring ... please ignore (for now) the mess of red wiring.

I need to add more weed, bushes, and lots of garbage and assorted refuse. 


Wednesday, April 5, 2023

April 2023 Updates

 For the month of March I spent significant time working on various plans and assembly methods for my 3D printed L structure.

Some updates:

Chicago Loop Elevated Project

My structure again is based off of the Wells Street leg, but with minor modifications it could pass for Wabash Avenue if needed.

I've assembled three feet and built a small display module that I may either turn into a stand alone diorama or incorporate into the larger layout.

Currently, the structure is only painted in grey primer (Rustoleum automotive grey) and held temporarily together with low tack glue on the bracing.
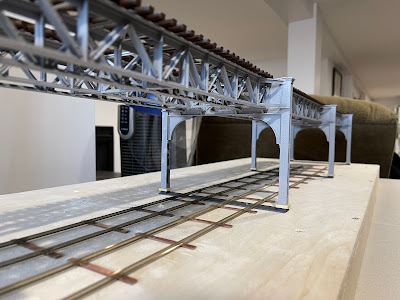


Clearance under the L is set to a little more than 16 feet. With the foundations, its about 17 feet from top of streetcar rail to bottom of cross girder. That "might" be a bit low, but I couldn't find definitive answers on how really HIGH the structure is. On-site measurements could've attracted unwanted attention from local law enforcement so this was the best I came up with.

However - it is easy to add height to the columns so if I did wish for it to be higher it is a minor modification.

Generic New York City / Brooklyn structure, side project

On a whim - I decided to see what it would take to built a three track structure like those found in Queens, the Bronx or Brooklyn. 

Below are the results:


In this structure I tried to see how close of a tolerance in fitting the pieces I could do on my printer. This should've been a 100% friction fit - minimal glue needed. However, I think my printer is over extruding ever so slightly just to make parts not quite fit. Some additional filing is needed to make everything go together. But, it was a good test to determine the interconnectivity between parts.

No worries though - I have no plans on switching to NY subway modeling.

East 63rd Street Structure, NEW project

Taking what I learned from the NYC structure and Loop L, I've started designing Chicago 63rd Street lattice elevated.


The 63rd street bents have an odd style where there are "multiple" parts within the bents. I've tried duplicating this using a spacer to give the illusion of the parts. I've also tried to model the period before additional strengthening was added to the structure. I could've tried to make the lattice girders less "bulky", but I was worried about strength. It seems the prototype wasn't quite built to robust standards so making a exact copy of the prototype seemed unwise.

So far I have one foot of structure printed. I'll be doing a three foot section similar to the Chicago Loop structure. 

St. Petersburgh 6000's

I acquired a set of 6000's at the Chicago March O scale meet that have led a tough life. While these were powered via a Q-Car truck, the power car had been crunched at one point. The floor was broken and there was some damage to the B end. I figured that since these are somewhat rare I'd take the chance and attempt to repair.

So far I've reprinted (via the 3D printer) a new floor for the power car. I need to shim the power truck but it does fit nicely. I've since done some touch up paint work but I don't have that documented. I've saved the underbody details from the original broken floor and will be re-attaching those. This will eventually be converted to wireless Bluetooth battery powered as is being done with the rest of my cars. 

BTW - Tamiya red paint is an exact match for the paint St. Petersburgh used.

The below photo is BEFORE I touched up the paint ... hence the paint mismatch on the B end of the left hand car.


Some layout progress:

Even with all of the above ... I can't keep neglecting the layout. I did manage to begin painting and final detailing of one of my foreground structures. 


I'll eventually be adding an interior, with lighting, to this building. 


Tuesday, February 28, 2023

March 2023 Updates - Off to a Strong Start

Winter months do allow for additional modeling time ... so, I've been trying to make as much progress as I can.

Updates since my last post:

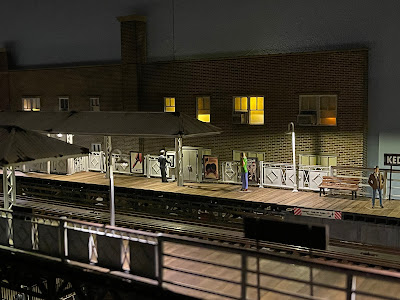
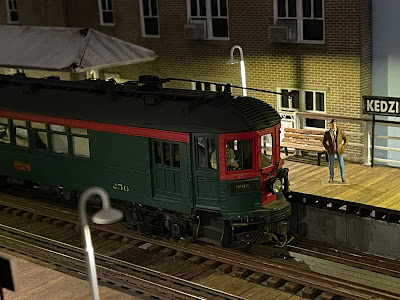
The work around my Kedize station continues. I've finished the background building that acts as a background to the station to a point where I've added lights and other minor details. It acts as good photo background for the station. I've also started construction on a foreground building that will most likely be a bakery.


I've also added some additional street lighting to the Kedzie street scene. Another new foreground building is being constructed. A tenant has yet to be obtained, but I'm thinking it might be a reincarnated version of my Elevated Records shop that was on my prior layout.


Also, for the anniversary of the end of service of the North Shore on January 20, 1963, a special charter was arranged for enthusiastic North Short railfans and many pictures were had by all. 


In addition to normal modeling work, I've been attempting to perfect a 3D printed design and application of Chicago Loop L Structure. I'm attempting to make a standardized set of files that can be printed easy and assembled with minimal effort.

The follow is the second version and so far I'm happy with the end result. The structure is printed on two printers: an FDM Bambu Labs P1P in PLA and on an Anycubic Mono X resin printer.

Still in a state of assembly (no glue is used on the below photos - the fit has enough friction to hold it together sufficiently):


Details:


In the above, I still need to add the foundations and some additional bracing.

List of materials:

  • FDM Printed on P1P:
    • Girders
    • Cross girders / bents
    • Internal X-Bracing
    • Internal zig-zag bracing
    • Foundations (not shown)
  • Anycubic Resin:
    • Columns
    • Curved Bracing
    • Girder bracing from cross girders / bents (not shown)

The columns are design to fit onto pegs on the foundation pieces. This "locks" the structure to the benchwork without having to actually attach the structure via mechanical means. 

I prefer to use FDM when I can. The post-processing of the resin prints (cleaning and curing) and associated smells of the resin is quite annoying. The quality of the P1P is sufficient for the girders, but I'll probably continue to use the resin printer for columns and bracing details. 

As to how this is printed - at least for the FDM parts all are printed flat to the build plate then sandwiched together:


The girders are comprised of four parts, with the associated joints staggered for strength.

The girders that are on the "inside" of a track's girders are modified in such a manner as to allow for the fitment of the X-bracing and zig-zag bracing. The foundations are one piece which maintains proper spacing between the columns. Each piece also has appropriate rivet details.

The columns, printed via resin, are printed upside down with applicable supports:


Normally I will print the columns in batches of eight columns total on the build plate.  

Below is a screenshot of my work flow in designing the overall structure and eventual station. I build off of previous work and create appropriate structural components as I go along. This is drawn in real size / to scale. When I'm ready to print, I'll split the model into sections that will fit on the printer and then scale the parts down to 1/48 scale, export to STL, and the send to the appropriate printer.


There is a significant amount of trial and error as I attempt to get components to fit together, with detail, and while keeping in mind printing limitations and eventual assembly. The goal is to create parts that will print successfully, require minimal to no supports/post processing, and ease of assembly.

The plan is to use this as a Loop elevated extension to the layout. I'm in the process of designing a station but that is most likely a late Q2 project.