Sunday, February 22, 2015

First time ever in O scale! A Sterns and Wards Coupler! And some other updates ...

One of the 3D printing projects I've been working on was a Sterns and Wards coupler. This type of coupler was used on the Cincinnati Car Company CRT / CTA 4000 series cars. I just got the prints, in both FUD and brass back from Shapeways and both prints were a success!


Pardon the blurriness of these photos. These parts are small, and some photos were taken with my phone.

The plastic version is detailed to scale, with appropriate MU connectors underneath the coupler head.


A grove is centered on the underside so the mounting hole can be drilled for mounting, giving the modeler the choice on how to mount.

The FUD versions, while non-functional, do actually slot together.


The couplers are "sprued" together along with extra MU couplers and roof vents for the 4000 series Baldies to keep the costs as low as possible.


I also printed a set in brass. These were connected together to keep the sett-up costs low. Due the the lower resolution offered with brass, no MU connectors could be added. These can be added as they are printable in FUD.


A view on the car:


A grove has also been left on the conjoined brass version to act as a guide for sawing the two apart. 

The brass version was more of an experiment as the cost is prohibitive for actual use.

In other 3D printing news. I also got the curved roof vents for the Baldies back. These are shown sitting on the roof (not glued yet):


I have also finished the facade of the one story commercial building that will go next to the Sheridan curve:


I have run out of brick sheeting, so finishing this building will have to wait until I can order more.

I have also finally finished the girders on the L structure extension. The new section is just propped into place, I am currently working on the columns.


The columns are attached last as the height is determined by measuring from the bench work to the bottom of the girders.The cast resin corner braces (cast from a 3D printed master) are added last.


Sunday, February 15, 2015

Cheap and Easy O Scale Storefronts

Recently there was a post on the Facebook traction modelers' group about who makes the best O scale storefronts. My comment was to make your own. Scratch building O scale buildings is remarkably easy and rather inexpensive.

So, to back this claim up, I decided to document the construction of an O scale building. starting with the storefront.

Materials used (I unfortunately did not document exactly what I used. BUT ... the below list encompasses about 90% of all the materials that I use on all my buildings):

  • N Scale Architect brick sheets
  • Evergreen styrene sheets:
    • 040" thick sheet
    • 020" thick sheet
  • Evergreen styrene strips:
    • .015 x .125
    • .030 x .030
    • .040 x .040
    • 0.40 x .100
    • .040 x .125
    • .040 x .188
    • .040 x .250
    • .060 x .060
    • .100 x .100
    • .100 x .188
    • .100 x .250

The space I want to fill is in front of my "Sheridan Curve":

Since I didn't want to obscure either the L structure or the TV, I decided to make a one story building. The overall design is based loosely off of a DSL Shops building, but scaled to fit the space. I drew a very rough sketch of the building out on a piece of paper:

To start construction, you need to think in three dimensions and work from the inside out. That is, you start from the most "inside" portions of the storefront and work towards the outside. You are layering items to create depth. First up, the base of the storefront:

I do try to follow the plan, but its still rather a "free form" process:


Add some sheet styrene to tie the door frames to the sides of the store front:

I add some layers to the base to add depth:

Followed by some foundation blocks. Round these pieces off with a file to simulate them being made of stone.

Next, start adding the window mullions. My spacing is a touch off, but not really to concerned .. its close enough.

Add horizontal mullions next, stacking various shapes on top of each other to simulate window frames:

I tied the two sides together with a door step, also rounded off with a file to simulate it being made of stone.

A door was made next. I made it separate from the storefront so that painting will be easier. I decided to go with a double door ... it helps get more O scale shoppers into the store.


The door in the storefront. I won't glue it in permanently until I paint everything.


Next I laid out the brickwork above the storefront. I decided to make a curved top to add architectural detail. I drew the curve using a plastic container, then laid out the roof lines and a section where I wanted to recess the brickwork. 


Carefully cut the brick out, paying particular attention around the curved portion. Plan ahead for any areas where you want to recess sections of brick. The N Scale Architect brick sheets are 0.020" thick so they do cut very easily. Use .020" styrene to add depth to the recesses.


I added some soldier course bricks to outline the center recess to add some details.


The back is "thickened" using larger styrene shapes. This gives the wall prototypical thickness and heft.


A test fit of the newly joined storefront and brick facade. It fits well in the space:


Next, I made the side brick pillars that "frame the storefront. These protrude slightly from the facade to give some relief to the front of the building. I am in the process of adding stone details to the bases of the pillars.


I hope that these pictures show how easy it is to make your own O scale buildings. By doing this, all your buildings will be unique to your layout.


Wednesday, February 11, 2015

Why nothing ever seems to get done ... or maybe project management issues? Part two ... 3D Projects

The following is a review of some of the 3D printing projects that I am currently working on.

1) CRT 4000 Baldie:


If you haven't been following, please read Ed Halstead's Modeling Insull's Empire in O Scale as Ed has been building the Cincinnati Car Company 4000 series O scale car. Ed is a true master craftsman and definitely knows how to make a fantastic model!

But, in watching Ed's progress, and with my experiences with Shapeways, I've begun to rethink how the car is actually assembled. I've has some issues with Shapeways' parts warping, so I've been working on a redesign of the interior of the car that hopefully will minimize this warping and ease in assembly.

I've tried to make a "tab and slot" method of construction that adds additional gluing surface while adding features that hopefully can minimize warping.

The following picture illustrates on how this would work. Each printed part is a different color, and the parts now have tabs and slots to better key the parts together.


In addition to these added construction aids, I've also begun the design of interior bulkheads and bowling alley seats. Hopefully the bulkheads will have the benefit of also adding strength to the model.


Space has been left in both the bulkheads and seats to allow for the necessary brass square stock to be added to the model to aid in stiffening the shell. 

In addition to the seats and bulkheads, roof vents are also being printed.


I have also finished most of the variations that a Baldie could ever come in. Again, the model will have a "mix and match" philosophy where the modeler can obtain whatever odd-ball variation desired just by picking the desired parts to be printed. So, as per the below, both ends with safety glass and traffic light style route markers:


Plus safety glass side doors:


2) Sterns and Wards Coupler:

For the first time ever in O Scale, a S&W couple will be offered! The design is currently at Shapeways and is being printed in both brass and Frosted Ultra Detail plastic.


However, the coupler will not be functional, but they "should" slot together. 


Brass is more of an experiment at this point as the cost for a pair is rather substantial.

3) 4000 Series Plushie

I haven't begun these drawings yet, but since the plans for the Plushie is very similar to the Baldie, this hopefully will be a easy project. One challenge will be that the side (less end doors) will be printed in one piece. I have printed objects this large at Shapeways so hopefully all will work out.

4) Met Car 2800.

Work continues slowly on Met car 2800. The initial plans for the ends are complete, the sides will be next.


5) CSL 2843

The initial designs for Chicago Surface Lines (South Chicago City Railways to Calumet & South Chicago Railway previously) # 2843 are done.


This was done more of a training exercise to see if I could figure out the compound curves found on the front of a CSL streetcar. I wound up being easier to model that I thought.

6) Other rapid transit cars "in the queue"

I hope to start initial drawings on the following cars (I have drawings so these are at the top of the list):

  • A Northwestern Elevated Car, most likely # 260
  • A South Side Elevated Car
7) CRT / CTA Westinghouse-Baldwin electric locomotive S-105

Model Railroader published a set of plans for this type of electric locomotive so this is a definite candidate. Also, the size of the locomotive makes it very attractive for 3D modeling.

8) Metropolitan elevated structure

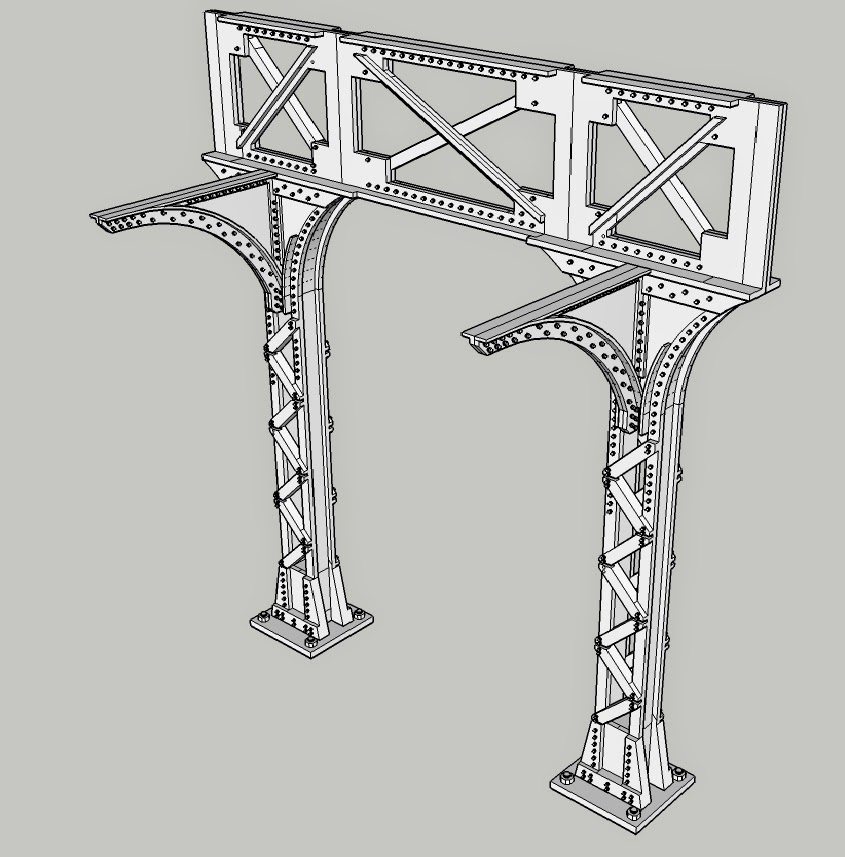
The prototype prints for the Met structure were received. Some modifications still need to be made, and once completed, I will order another set.


 These parts will be used to make rubber molds were resin copies can then be made.

I need to make some modifications to the parts as I made these all to scale. That is, I forgot that O scale is 5 foot in gauge! My parts are all sized for proto-48 scale, that is, 4' 8 1/2 gauge. 


In addition to these 3D printed masters, I need to make new girder masters from styrene (cheaper to make in styrene). In my previously made girder masters I did not account for the internal bracing and webbing found between the girders. The new masters will have provisions for this bracing. I will also make modifications to aid in assembly.

9) Ravenswood style elevated structure. 

Currently I only have corner braces made in 3D. I'll probable make styrene masters for the columns and girders as the parts are less complicated.


10) "Dream Cars"

I've obtained a scale plan for Chicago Aurora and Elgin Cincinnati Cars 420 - 434 so if I find time, that might make a good candidate for a 3D printed car.

In addition, I'm searching for scale plans for any North Shore cars ... those are always a good candidate!

So, as you can read, too many 3D projects in various states of completion to count!